How to Master Rebar Threading in Less Than an Hour
Rebar Threading: What It Is and Why It Matters on Every Job Site
Rebar threading is the process of cutting or rolling screw-type threads onto the end of a steel reinforcing bar so it can be joined to an anchor, coupler, or structural connection point.
Here’s a quick overview of what you need to know:
- What it is: Creating external threads on rebar ends to enable mechanical connections
- Two main methods: Cut threading (removes metal, reduces strength) vs. roll threading (cold-forms the thread, preserves strength)
- Why it matters: Threaded connections replace lap splices and hooks, saving space and material in congested rebar cages
- Key challenge: Standard rebar can’t be threaded directly — the surface deformations make the diameter too small for proper thread tolerances
- Common uses: Anchor bolts, mechanical couplers, precast connections, seismic detailing
Rebar is in nearly every concrete and masonry structure built in the United States. The country produced over 7 million metric tons of it in 2018 alone. With that kind of volume, getting connections right isn’t optional — it’s structural.
The problem? Threading rebar isn’t as simple as running a die over the end. The raised deformations (the ridges that help concrete grip the bar) create an uneven surface. The diameter between those deformations is actually smaller than what most standard threads require. For example, a #8 rebar measures just .960 inches between deformations — but the minimum major diameter for a 1-inch UNC thread is .9755 inches. That gap causes real problems.
Only a limited number of companies can thread rebar ends effectively — and doing it wrong creates liability, weak connections, and failed inspections.
This guide walks you through everything: the methods, the machines, the specs, and the safety steps — so you can get threaded rebar right, every time.
What is Rebar and Why is Rebar Threading Essential?
To appreciate why rebar threading has become a cornerstone of modern structural engineering, we first have to look at how concrete behaves. Concrete is exceptionally strong under compressive loads—it can support massive buildings, heavy highway overpasses, and deep foundations without breaking a sweat. However, its tensile strength is notoriously poor. When subjected to pulling or bending forces, unreinforced concrete will crack and fail almost instantly.
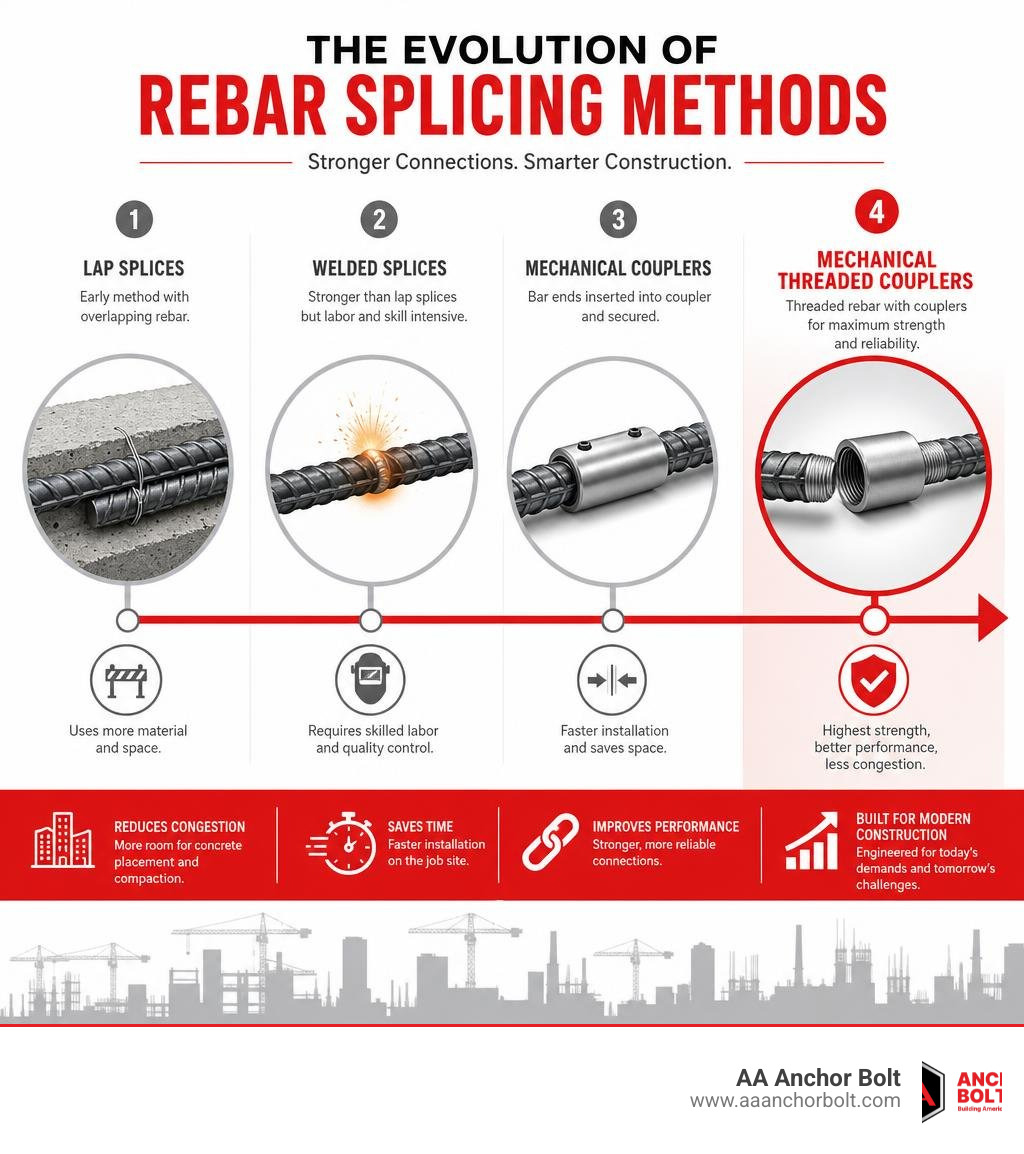
That is where reinforcing steel, or rebar, comes into play. By embedding steel bars within the concrete matrix, engineers combine the compressive strength of concrete with the incredible tensile capacity of steel. Historically, joining these reinforcing bars together meant overlapping them side-by-side (lap splicing) or welding them on-site. However, modern engineering demands more elegant, space-efficient, and reliable solutions.
This is where mechanical splicing and threaded systems enter the picture. By threading the ends of reinforcing steel, we can screw them directly into mechanical couplers, structural anchors, or custom-fabricated assemblies. Whether you are working with custom fabricated rebar products or anchoring heavy machinery to a foundation, a threaded connection provides a continuous load path that traditional methods simply cannot match. It transforms individual steel bars into a single, cohesive structural network.
The Role of Deformations in Concrete Bonding
Standard rebar is not smooth. It is manufactured with highly visible surface ridges, known in the industry as deformations. These pattern-rolled ridges are not just for aesthetics; they are engineered to maximize concrete adhesion.
When concrete is poured around deformed rebar, the wet mixture flows into the valleys between these ridges. Once cured, the concrete mechanically locks onto the bar. This mechanical interlock ensures that tensile forces are smoothly transferred from the concrete to the steel, preventing the bar from slipping when the structure is subjected to heavy loads.
While these ridges are indispensable for concrete bonding, they present a major headache when it comes to threading. Because the deformations project outward, the core diameter of the bar (the solid cylinder of steel beneath the ridges) is significantly smaller than the nominal diameter of the bar itself. Trying to thread directly over these ridges without proper preparation results in shallow, incomplete, and structurally useless threads.
Why Traditional Lap Splices are Replacing by Threaded Systems
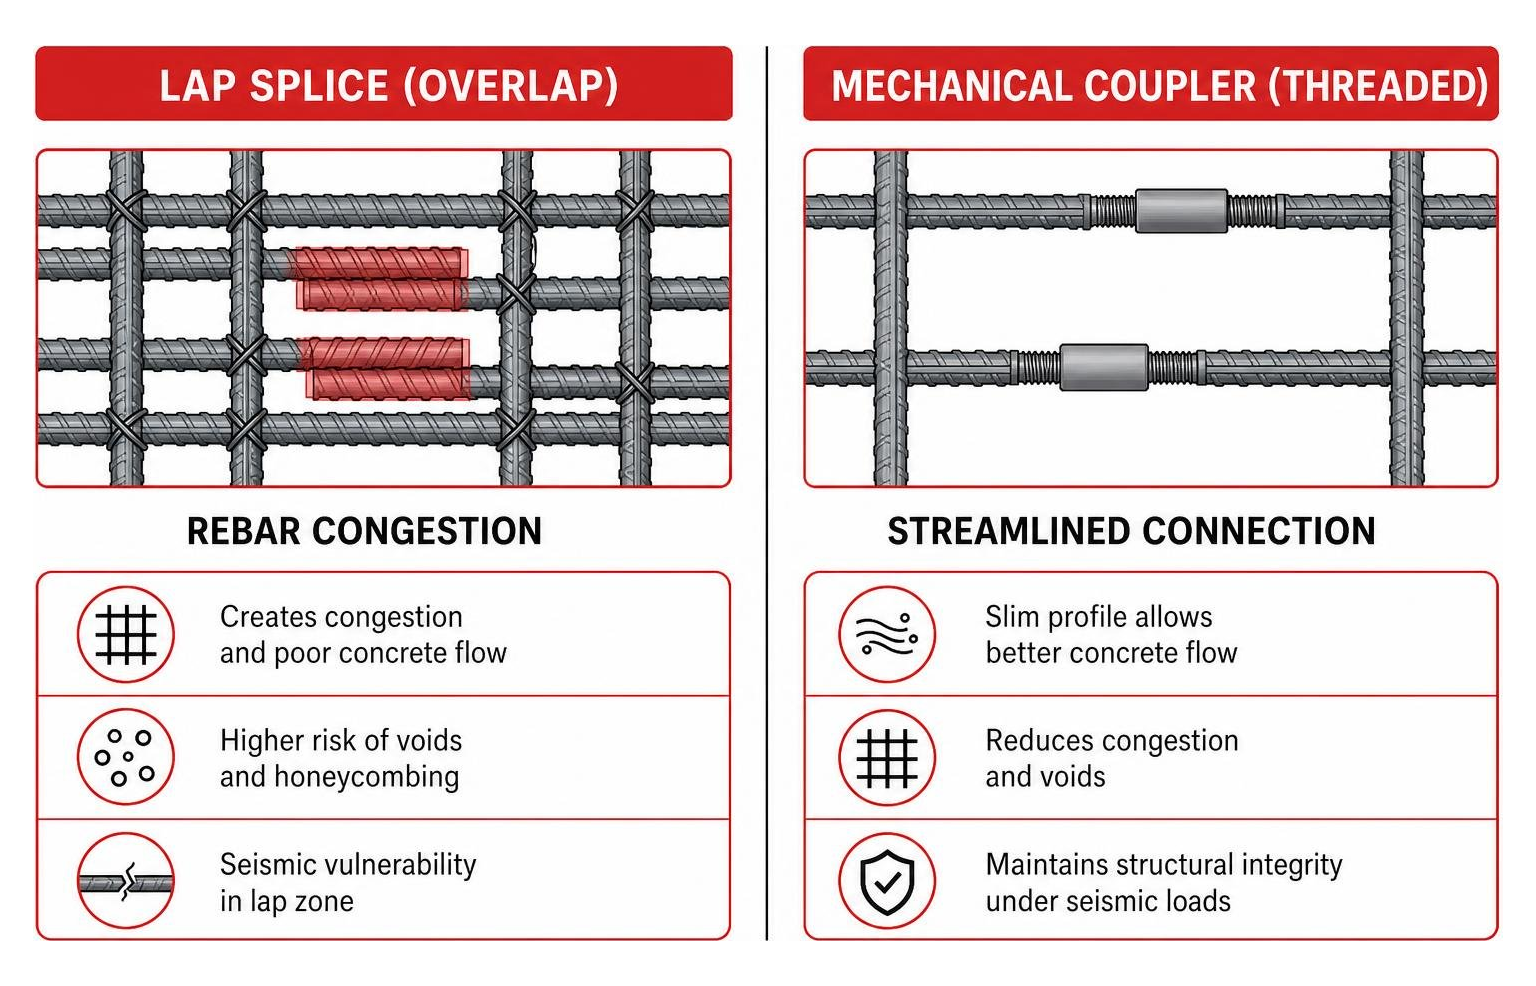
For decades, the standard way to join two pieces of rebar was the lap splice. You simply overlap the two bars by a calculated distance (often 30 to 50 times the bar diameter) and tie them together with wire. The concrete is then expected to transfer the load from one bar to the other.
While simple, lap splices have major drawbacks:
- Rebar Congestion: In heavily reinforced structures, such as bridge columns, high-rise shear walls, or seismic joints, overlapping bars double the amount of steel in a small area. This creates tight grids where aggregate gets trapped, leading to dangerous concrete voids and honeycombing.
- Material Waste: Overlapping feet of high-grade steel on every single connection adds up to thousands of pounds of wasted material across a project.
- Seismic Vulnerability: During an earthquake, concrete in the lap zone can degrade and spall. Once the surrounding concrete fails, the lap splice loses its ability to transfer loads, leading to catastrophic failure.
By switching to mechanical couplers and threaded systems, you achieve true structural continuity. The bars are joined end-to-end, maintaining a slim profile that allows concrete to flow freely. For a deeper dive into how these mechanical systems stack up against traditional methods, take a look at our guide on Get a Grip: How Rebar Splice Couplers Keep Concrete Strong.
Cut Threading vs. Roll Threading: Key Differences and Challenges
When it comes to putting threads on rebar, you have two primary options: cut threading and roll threading. Understanding the difference between these two processes is critical for maintaining structural integrity and passing building inspections.
| Feature | Cut Threading | Roll Threading |
|---|---|---|
| Process | Material is physically removed by cutting dies to carve out threads. | Steel is cold-formed and compressed using high-pressure rolling dies. |
| Grain Flow | Cuts across the natural steel grain, leaving exposed end-grains. | Redirects and compresses the grain flow, keeping it continuous. |
| Material Strength | Reduces the cross-sectional area and weakens the connection zone. | Work-hardens the steel, making the threaded area stronger than cut threads. |
| Diameter Requirement | Requires turning down the bar or stepping up a rebar size. | Uses the pitch diameter, preserving the parent bar’s structural rating. |
| Surface Finish | Can leave rough edges, tearing, or microscopic stress-concentration cracks. | Produces ultra-smooth, high-precision threads with zero material waste. |
The Technical Challenges of Cut Rebar Threading
Cut threading is the traditional approach. A cutting die physically carves away steel to create the thread valleys. While this works beautifully on smooth round stock, standard deformed rebar presents a major hurdle.
Because the diameter inside the deformations is smaller than the minimum allowable major thread diameter, you cannot simply run a standard cutting die over raw rebar. If you try, the die will only cut into the high points of the ridges, leaving deep, empty voids where the deformations dip down. The resulting thread will be weak, stripped, and unable to engage a standard nut or coupler.
To get around this, fabricators must use a “turning down” process. The end of the rebar is placed in a lathe or milling machine, and the deformations are machined off until a perfectly smooth, round cylinder remains. However, because you have shaved the bar down to its core diameter, you have significantly reduced its cross-sectional area.
To achieve a true 1-inch thread using cut threading, you cannot start with a 1-inch (#8) bar. You have to step up to a larger #9 or #10 bar, turn it down to the correct major diameter, and then cut the threads. This adds weight, cost, and design complexity. If you want to see how precision threading is handled on industrial scales, you can explore heavy-duty equipment through Pipe & Bolt Threading Machines for Fabrication – Oster Manufacturing.
How Roll Rebar Threading Preserves Material Strength
Roll threading is the gold standard for high-strength structural connections. Instead of cutting away metal, roll threading uses extreme hydraulic pressure to cold-form the steel. Rolling dies squeeze the steel, displacing it from the thread valleys and forcing it upward to form the thread crests.
Because no material is removed, the physical grain of the steel is not severed. Instead, the grain is compressed and redirected, following the contour of the threads. This cold working process work-hardens the steel, significantly increasing its tensile strength and fatigue resistance at the connection point.
To prepare rebar for roll threading, a specialized machine performs a rapid “rib stripping” process to shave off the outer deformations to a precise pitch diameter. The rolling dies then roll the threads back up to the full nominal diameter. This means you can achieve a full-strength 1-inch thread on a standard #8 bar without having to upsize your steel. For a comprehensive breakdown of the machinery that makes this possible, consult the Rebar Threading Machine Guide — Types, Specs, Selection | SpecForge.
Step-by-Step Guide: How to Thread Rebar Safely and Efficiently
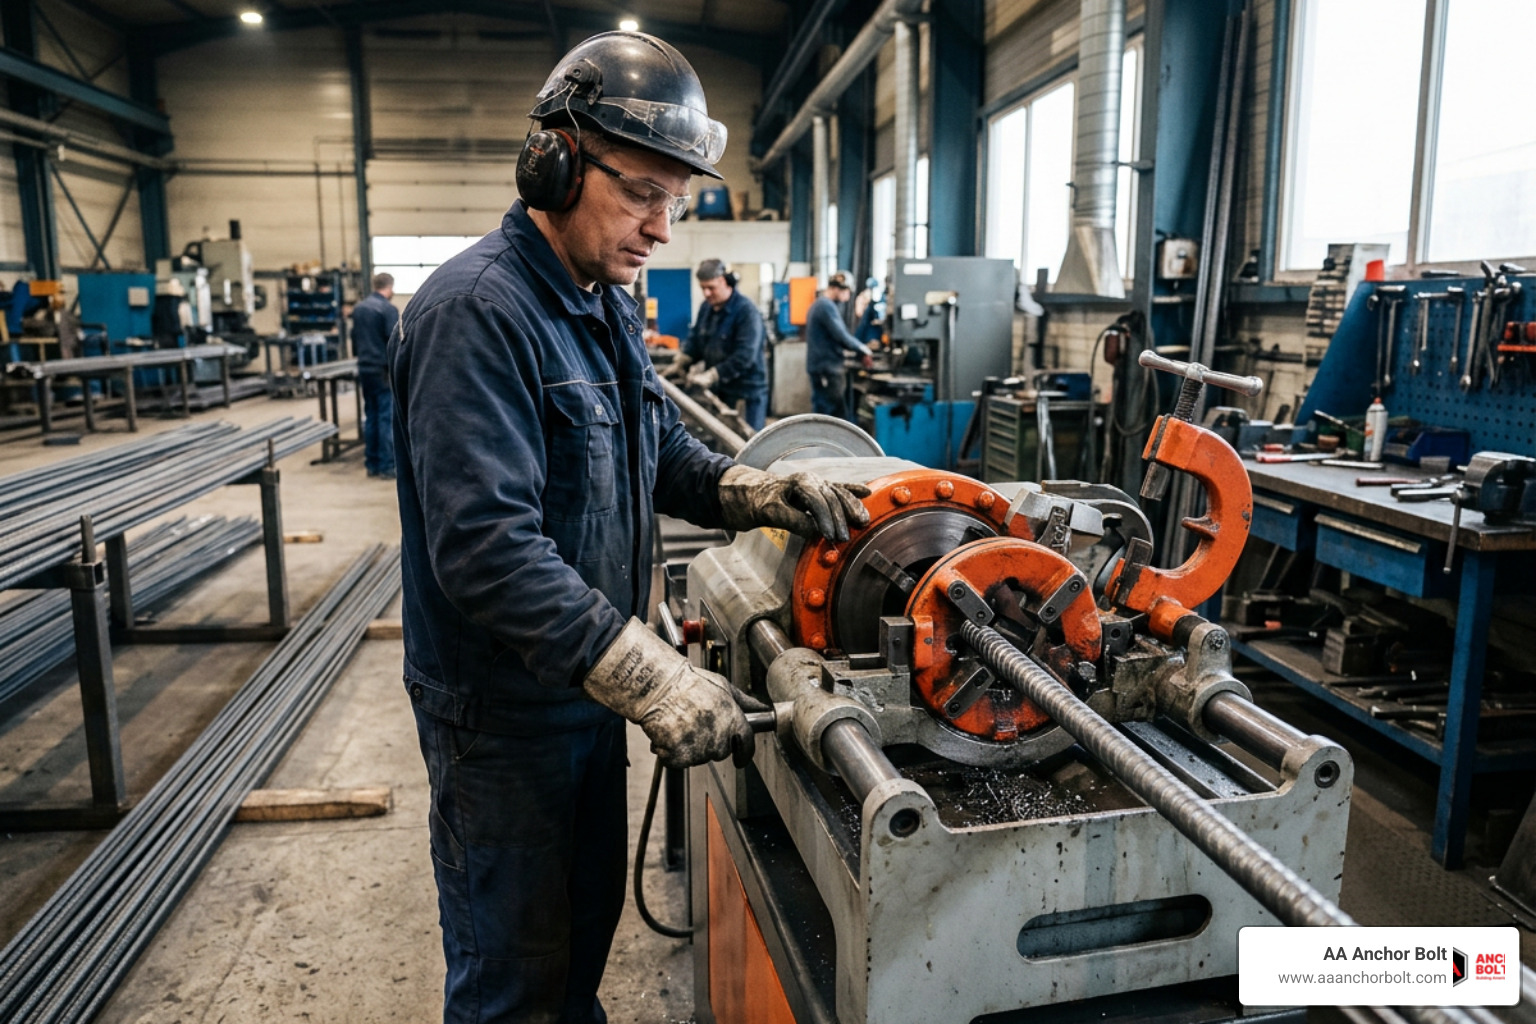
Now that you understand the mechanics, let’s walk through how to actually thread rebar in a production environment. Whether you are using a stationary bench threader or a portable job-site machine, the core process remains the same.
Step 1: Cut and Prep the Bar
Begin by cutting your rebar to the exact length required. The cut must be perfectly square (90 degrees) to ensure the threading dies engage evenly. Any angled cuts will cause the threading head to wobble, leading to crooked or stripped threads.
Step 2: Strip the Ribs (If Roll Threading)
If you are using a modern parallel-thread rolling machine, clamp the rebar into the self-centering vise. The machine’s stripping blades will advance, shaving off the raised deformations over the specified thread length. This leaves a clean, smooth cylinder prepped to the exact pitch diameter.
Step 3: Roll or Cut the Threads
For roll threading, the rolling head will automatically engage once the ribs are stripped. The dies rotate and press the steel into shape in a single, continuous cycle that typically takes 15 to 30 seconds. If you are using a tapping arm or a specialized cut-threading machine, ensure the die head is perfectly aligned over the prepped bar before initiating the drive. You can learn more about fast-operating tapping arms from How to Quickly & Easily Thread Rebar – Flex Machine Tools, or explore our own threading capabilities on our Services page.
Step 4: Clean and Inspect
Once the cycle is complete, back the machine off and clean the newly formed threads with a wire brush to remove any microscopic metal shavings or excess lubricant.
Selecting the Right Equipment and Dies
Choosing the right machinery depends on your production volume, bar sizes, and project specifications.
- Motor Power & Spindle Speed: Heavy-duty structural rebar (such as #11 to #18 bars) requires high-torque machines with motors ranging from 3 kW to 7.5 kW and low spindle speeds (28 to 62 r/min) to handle the extreme resistance of high-grade steel.
- Die Selection: Rolling dies must match both the bar size and the required thread pitch. For example, standard US threads typically require 8 threads per inch (TPI) for a 1-inch connection, while metric international systems use pitches of 2.5 mm to 3.0 mm.
- Processing Diameter: Ensure your machine’s clamping jaws and die head can accommodate your entire project scope. A standard “40-class” machine can typically process bars from #5 (16mm) up to #12 (40mm).
Best Practices for Threading and Quality Control
To guarantee that your threaded rebar connections will pass inspection and perform flawlessly under load, adhere to these strict quality control guidelines:
- Abundant Lubrication: Always use high-quality threading oil or water-soluble coolant during the cutting or rolling process. This reduces friction, prevents the steel from tearing, and drastically extends the life of your expensive dies.
- Go/No-Go Gauge Testing: Keep a calibrated set of ring gauges on hand. The “Go” gauge should thread onto the bar smoothly by hand, while the “No-Go” gauge must not thread on more than 1.5 turns.
- Visual Inspections: Check for torn thread crests, pitting, or incomplete thread profiles. If you notice “flaking” or rough finishes, your dies are likely worn and need replacement.
Essential Safety Gear Checklist:
- Heavy-duty safety glasses or face shields (to protect against flying metal chips)
- Snug-fitting leather gloves (avoid loose gloves that can get caught in rotating machinery)
- Steel-toed boots (rebar is heavy and loves to roll off benches)
- Hearing protection (industrial threaders can be loud over long shifts)
Frequently Asked Questions About Rebar Threading
Can you cut thread standard rebar without turning it down?
No. As we discussed earlier, the core diameter of deformed rebar (the solid steel cylinder beneath the ridges) is smaller than the minimum allowable major diameter of a standard thread. If you attempt to cut threads directly onto raw rebar without turning it down first, the cutting die will only carve into the outer ridges. This leaves deep, empty gaps where the deformations dip down, resulting in shallow, structurally deficient threads that will strip instantly under tension. To cut thread properly, you must turn the bar down to a consistent surface, which requires stepping up to a larger rebar size to achieve your target thread diameter.
What is the difference between parallel and tapered threads?
Parallel (straight) threads maintain a constant diameter along the entire length of the threaded zone. They require more rotations to install (typically 10 to 12 full turns for a secure connection) but offer excellent tolerance for slight misalignments.
Tapered threads are cut or rolled at an angle, narrowing toward the tip of the bar. Because of this wedge-like shape, the bar can be inserted almost all the way into a matching tapered coupler before any resistance is met. Tapered connections require only about 30% of the rotations of a straight thread (typically just 4 to 5 turns) to lock up tight. However, they require strict torque control during installation and have less tolerance for cross-threading.
How deep must rebar be threaded into an anchor?
To achieve full structural strength, the threaded steel must be engaged to a depth at least equal to the nominal diameter of the bar. For example, a 1-inch diameter (#8) rebar needs to be threaded into its anchor or coupler at least 1 inch deep. For standard 1″-8 UNC threads, this requires a minimum of 8 full rotations.
Failing to meet this minimum engagement depth means the threads will shear off before the bar can reach its ultimate tensile capacity. When assembling these critical connections, it is also highly important to select the correct mating hardware; learn more about this in our article on How to Choose the Right Anchor Bolt Nuts for Your Next Project. For high-stress foundation work, you might also want to compare these systems with heavy-duty anchors, such as those discussed in our overview of Hold On Tight with These Heavy Duty 8 Inch Concrete Screw Anchors.
Conclusion
Mastering rebar threading is all about understanding the relationship between the steel’s physical geometry and the mechanical forces it must withstand. While cut threading has its place for specific, oversized applications, modern roll threading is the clear winner for structural efficiency, speed, and material preservation.
At AA Anchor Bolt, we don’t believe in cutting corners. From our family-owned manufacturing facility in Northville, Michigan, we maintain full domestic control over our production line. With nearly a million pounds of raw steel kept in-house, we can handle custom threading, bending, and anchor bolt fabrication with the fastest turnaround times in the industry.
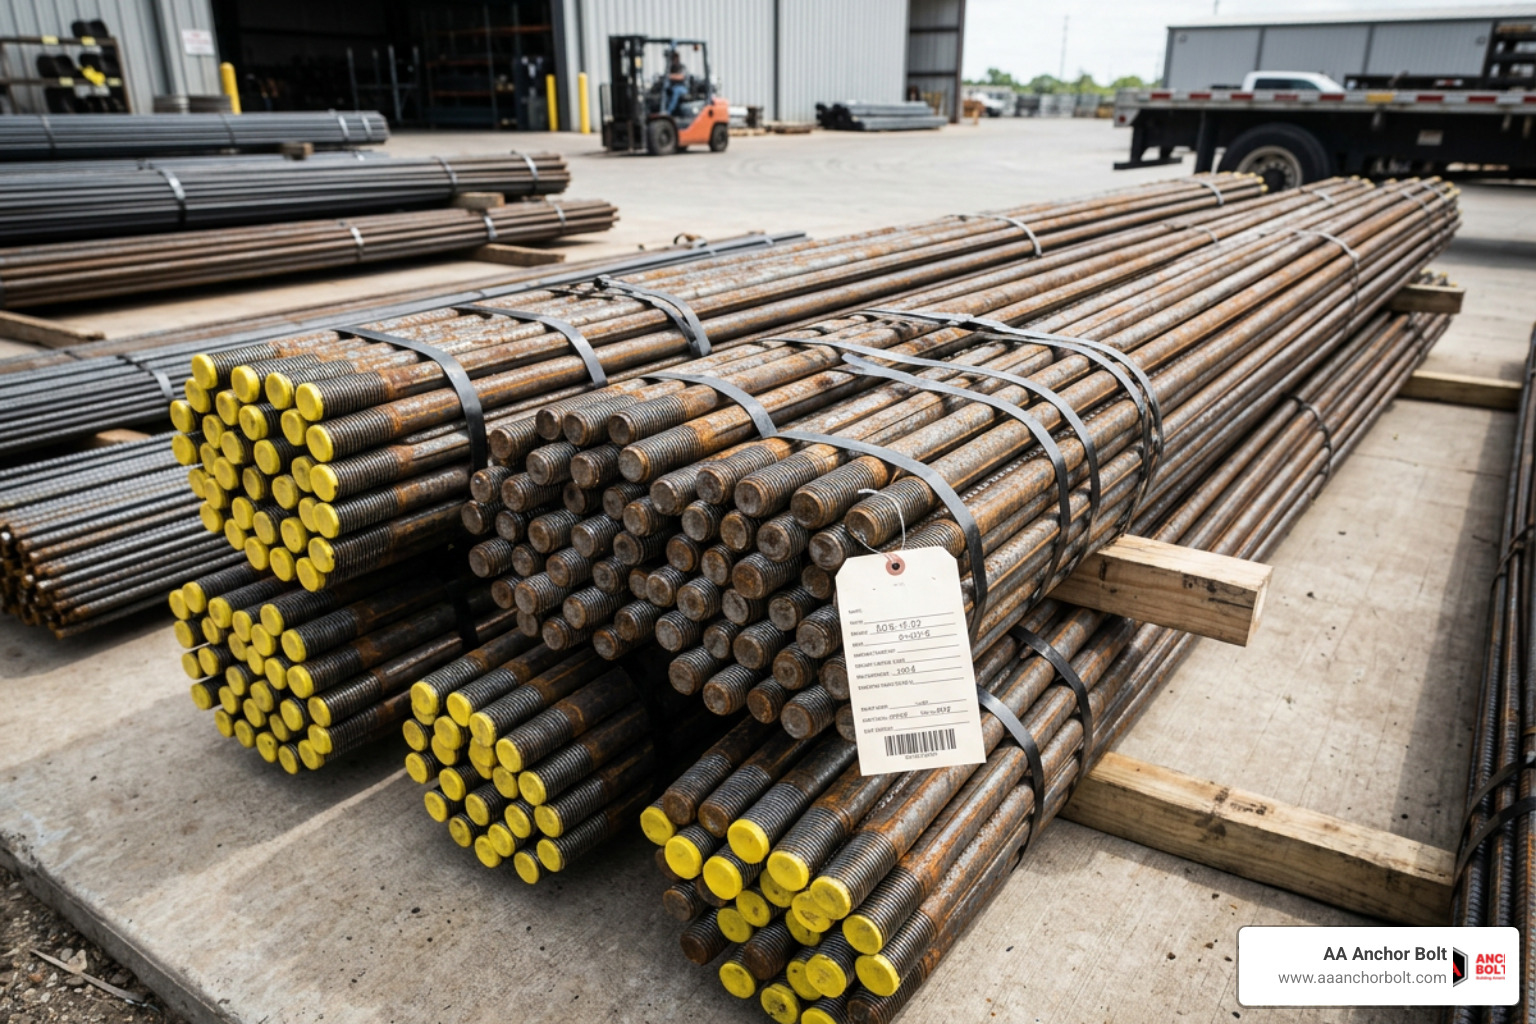
Whether your project calls for standard ASTM F1554 anchor bolts (which you can read about in our guide Demystifying ASTM F1554 Grades 36, 55 and 105) or custom-threaded rebar configurations, we have the machinery and the expertise to deliver exactly what your job site demands.
Ready to get started on your next project? Explore our full range of Products or contact us today to learn more about our custom Manufacturing Capabilities. Let’s build something strong together.